I’m going to kick things off by shining a light on the importance of lighting in photography and videography. You’re going to find out about the foundations that will transform your images from flat to fabulous. This isn’t just about brightening your subject; it’s also about sculpting with shadows and creating depth.
Let’s touch on the lighting basics you must know: key light, fill light, and backlight. Your key light is your main source, the spotlight of your setup. Fill light helps soften shadows, and backlight separates your subject from the background giving them a defining edge.
Now, it’s crucial to understand light quality. Hard light can create dramatic, sharp shadows. It’s bold and eye-catching. In contrast, soft light wraps gently around your subject, reducing shadows and creating a flattering, even look. Each has its place, depending on the mood and story you’re trying to convey.
By the end of this section, you’ll have a clearer picture of why lighting is pivotal for every shot. With this foundational knowledge, we’ll venture into the equipment territory. I’m here to help you navigate through the essential gear, preparing you to set up your very own studio.
Essential Equipment for Studio Lighting
Now, if you’re eager to get started with studio lighting, it’s crucial to know about the gear that’ll become your creative toolkit. Every photographer or videographer’s setup might vary slightly, but there are some core pieces of equipment you definitely need.
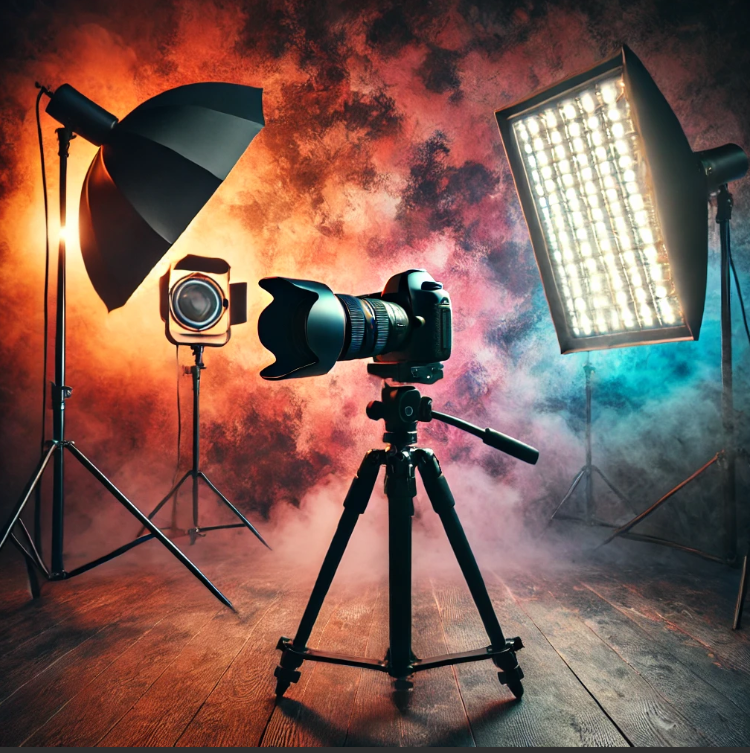
Key to your lighting kit are the light sources themselves. They come in two main types: continuous lights, which stay on all the time, and strobes, which flash when you take a picture. Continuous lights are fantastic for beginners because what you see is what you get, making it easier to understand how light affects your subject.
Then we have light modifiers. They shape and soften the light, and there’s a whole variety to pick from. Softboxes are popular because they create a diffused, even light that’s pretty forgiving. Umbrellas are another go-to because they’re easy to set up and portable. Grids are essential when you want to direct light precisely and avoid it spilling over into other areas of your shot.
CHECK OUT PRICING HERE
Of course, light sources and modifiers aren’t much use without something to hold them in place. That’s where light stands come in. You’ll find them indispensable for positioning your lights at various angles and heights. And don’t overlook the mounting accessories like brackets and clamps. They ensure everything stays secure.
Budget might be a concern when you’re just diving into the world of studio lighting. The good thing is there are affordable options out there that won’t break the bank. Start small, with what you need, and grow your kit as your skills and needs evolve.
So you’ve got your equipment sorted out? Fantastic. Next, I’m going to walk you through setting up a basic lighting scenario that’ll have you capturing beautifully lit shots in no time.
Setting Up Your First Studio Lighting Scenario
If you’ve got your basic lighting gear sorted, you’re ready to dive into your first setup. A simple one-light configuration is a fantastic beginning point and can teach you a lot about the properties of light and how it plays with your subject. Here’s how to get started.
A softbox is often your best friend when it comes to studio lighting. It diffuses the light, which means that it spreads the light out in a way that results in soft shadows and a flattering, even light on your subject. To use a softbox effectively, position it so that it’s facing your subject and angle it slightly downwards to mimic the natural fall of light.
Where you position your lights can have a huge impact. You’re going to find out how moving your light source closer or further from the subject can create dramatic effects. Bringing the light closer softens it, whereas moving it away creates harder, more defined shadows. Play around with angles as well; side lighting can emphasize texture and shape, while front lighting tends to flatten features.
Reflectors and diffusers are your allies in managing shadows and highlights. Reflectors bounce light back onto the subject, filling in unwanted shadows, and can be as simple as a piece of white cardboard. Diffusers, on the other hand, are like sieves for your light, spreading it out to eliminate harshness. Don’t shy away from experimenting with these tools — they’re key to refining your lighting.
CHECK OUT PRICING HERE
Don’t forget safety. Always secure light stands with sandbags to prevent tipping, and handle hot lights with care to avoid burns. Double-check all connections and settings on your lighting equipment before starting, ensuring a safe and productive shoot.
Mastering this foundational lighting setup primes you for the next stage, where you can get more creative and complex with your scenarios. In the next section, we’ll cover how to build upon your single-light setup, expanding into multi-light arrangements and introducing color and contrast for more advanced looks.
Advanced Techniques and Creative Lighting Setups
By now, you’ve got your feet wet with a basic one-light setup, and you’re getting the hang of sculpting light to enhance your subject. But studio lighting is a vast ocean, and there’s a lot more to explore. As you move forward, embracing a bit more complexity can truly transform your work.
Adding a second light into your arrangement opens up a world of possibilities. You’re going to find out about using a fill light to soften shadows, or perhaps a backlight to create separation between the subject and the background. Playing with ratios can give your work a whole new dimension.
Don’t shy away from color either. Integrating colored gels can have an impressive impact. They can add mood, indicate time of day, or just bring an edgy, artistic feel to your images. It’s like painting with light – choose something that resonates with you and your vision.
CHECK OUT PRICING HERE
Remember, controlling light is as much about shadow as it is about illumination. Take some time to learn how contrast works and how it affects the mood of your images. Soft, even lighting can convey one emotion, while stark contrasts tell a completely different story.
I encourage you to look into lighting for different genres. If you’re into portraits, study the classic lighting patterns and how they flatter various face shapes. For product photography, understand how to reveal the texture and color of the items you’re shooting. There’s a lot of opportunity in specialization.
Lastly, the journey doesn’t stop here. There are endless resources available – from online tutorials to workshops – that can help you hone your craft. I really hope that you continue experimenting, learning, and pushing the boundaries of what you can achieve with studio lighting.


Hello Randi!
I really enjoyed reading your beginner’s guide to studio lighting setups! It’s so helpful to break down the basics, especially for someone just getting started. I love how you’ve explained the importance of key lights and fill lights—sometimes those details can be overwhelming for beginners, so this was super clear.
I’m curious, do you have any tips for adjusting lighting when working in smaller spaces? I’ve been thinking about setting up a studio in a home office, and I’m finding it can be tricky with limited space. Do you think portable lighting options could work well for that, or would you recommend something more permanent?
Looking forward to hearing your thoughts!
Angela M 🙂
I’m really glad you found the guide helpful—lighting can feel overwhelming at first, but once you get the basics down, it gets a lot easier. For smaller spaces like a home office, portable lighting is a fantastic option! LED panels or ring lights are lightweight, adjustable, and easy to move around, which makes them perfect for tight setups.
If you’re looking for something more permanent, compact softboxes or wall-mounted lights could work too, depending on how much flexibility you want.